https证书分为收费和免费两种,我们这里选择免费的
Let’s Encrypt
总体来说分为四个步骤:安装 SSL 证书、部署 SSL 证书、修改网站配置文件conf 、网站 URL 中 HTTP 替换为 HTTPS。
环境:centos 6.8,nginx
一、安装 SSL 证书(Let’s Encrypt)
1)先安装 git 包
sudo yum install git
2)下载证书包
sudo git clone https://github.com/letsencrypt/letsencrypt /opt/letsencrypt
3)进入证书目录
cd /opt/letsencrypt
二、创建并部署 Let’s Encrypt SSL 证书
sudo -H ./letsencrypt-auto certonly –standalone -d example.com -d www.example.com
注意,你的网站域名如果是 xyz.com,那么上面就改为:-d xyz.com -d www.xyz.com
然后等待:
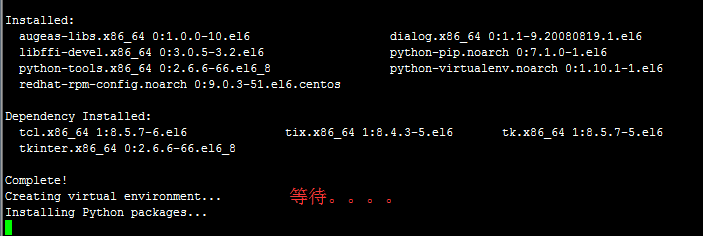
这个时候千万别动!等环境安装结束之后,会弹出一个界面,让你填写 email 地址。这个 email 地址是方便你接收证书密钥回复以及紧急信息的,尽量填写企业邮箱或者 gmail 邮箱,QQ邮箱没有测试过,不清楚是否支持。
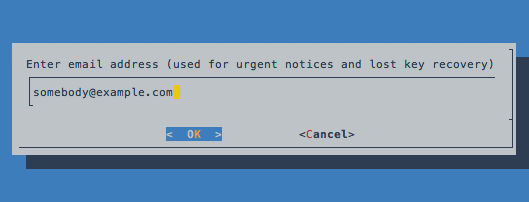
填写好之后,按 TAB 键光标移动到 OK,按回车继续下一步。
接着,会弹出是否同意的协议。agree 上按回车。
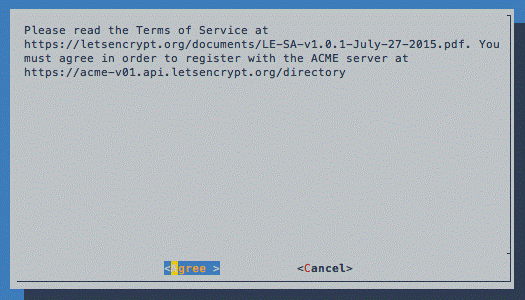
此时就准备创建证书了。
注意:如果你之前安装shadowsocks,那么这一步会提示 443 端口被占用,无法继续。由于 SS 是用服务器的 443 端口,而且目前进程默认开启,所以不能继续安装。此时中止安装,回到 Xshell 命令行界面,输入:service shadowsocks stop 然后回车。会停用 shadowsocks,把 443 端口空出来。

如上面截图所示,显示:
INFO:loading config from /etc/shadowsocks.json stopped
Stopping Shadowsocks success
这表明我们已经关闭了 SS 进程。此时重新粘贴上文蓝色粗体部分的命令(注意 example.com 替换成你的域名),然后回车执行,重新执行安装步骤。
最后成功创建证书。
一般情况下,屏幕显示创建的信息如下:
IMPORTANT NOTES:
– If you lose your account credentials, you can recover them through
e-mails sent to [email protected].
– Congratulations! Your certificate and chain have been saved at
/etc/letsencrypt/live/example.com/fullchain.pem. Your
cert will expire on 2016-03-31. To obtain a new version of the
certificate in the future, simply run Let’s Encrypt again.
– Your account credentials have been saved in your Let’s Encrypt
configuration directory at /etc/letsencrypt. You should make a
secure backup of this folder now. This configuration directory will
also contain certificates and private keys obtained by Let’s
Encrypt, so making regular backups of this folder is ideal.
– If you like Let’s Encrypt, please consider supporting our work by:
Donating to ISRG / Let’s Encrypt: https://letsencrypt.org/donate
Donating to EFF: https://eff.org/donate-le
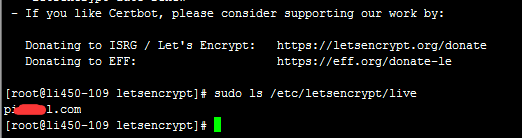
此时粘贴执行命令:
sudo ls /etc/letsencrypt/live
会在下一行显示你的网站主域名。如图中所示。
此时继续粘贴:
sudo ls /etc/letsencrypt/live/example.com
注意上面 example.com 替换成你的域名。此时会显示创建了 4 个证书。分别是:
cert.pem
chain.pem
fullchain.pem(公钥)
privkey.pem(私钥)
最后两个是我们要用的,需要写到虚拟主机配置文件 conf 里面。
三、修改网站配置文件
进入 /usr/local/nginx/conf/vhost/ 下的 你的网站的配置文件,通常是 xxx.com.conf 文件。下载下来编辑:
下面是已经配置好的代码。
server
{
listen 80;
server_name www.xyz.com xyz.com;
return 301 https://$server_name$request_uri;//这里的作用是将http转到https,所以这里要写你的域名地址
}
server
{
listen 443 ssl;
ssl_certificate /etc/letsencrypt/live/xyz.com/fullchain.pem;
ssl_certificate_key /etc/letsencrypt/live/xyz.com/privkey.pem;
ssl_ciphers “EECDH+CHACHA20:EECDH+CHACHA20-draft:EECDH+AES128:RSA+AES128:EECDH+AES256:RSA+AES256:EECDH+3DES:RSA+3DES:!MD5”;
ssl_protocols TLSv1 TLSv1.1 TLSv1.2;
ssl_prefer_server_ciphers on;
ssl_session_cache shared:SSL:10m;
# HSTS (ngx_http_headers_module is required) (15768000 seconds = 6 months)
add_header Strict-Transport-Security max-age=15768000;
# OCSP Stapling —
# fetch OCSP records from URL in ssl_certificate and cache them
ssl_stapling on;
ssl_stapling_verify on;
index index.html index.htm index.php default.html default.htm default.php;
server_name www.xyz.com xyz.com;
root /home/wwwroot/www.xyz.com;
location ~ .*\.(gif|jpg|jpeg|png|bmp|swf)$
{
expires 30d;
}
location /wp-content/uploads/ {
location ~ .*\.(php)?$ {
deny all;
}
}
location ~ .*\.(js|css)?$
{
expires 12h;
}
location ~ /\.
{
deny all;
}
access_log off;
}
注意检查一下,把上面所有的 xyz.com 换成你的网站主域名。然后保存。
四、上传网站配置文件,重启 nginx
上传第三步我们保存的 xxx.conf 覆盖掉原文件,
接着重启nginx:
/usr/local/nginx/sbin/nginx -s reload
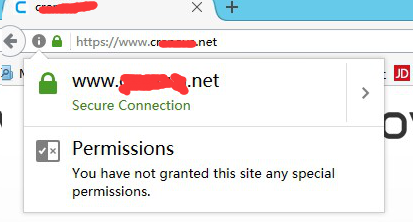
OK,此时 访问你的网站,会自动跳转到 https。
OK,此时再访问首页,已经是绿色小锁加持了!
为Let’s Encrypt证书续期
/usr/local/nginx/sbin/nginx -s quit———–停止nginx
cd /opt/letsencrypt ———– 进入目录
./letsencrypt-auto renew ———— 启动续期
证书续期遇到的一个问题:
提示:No module named virtualenv
原因是Python由2.6升级到2.7了。
解决方法:
卸载老的virtualenv,从pypi官方下载virtualenv,解压并重新用Python安装!
以centos为例:
yum remove python-virtualenv
wget https://github.com/pypa/virtualenv/archive/13.1.0.tar.gz
tar zxvf 13.1.0.tar.gz
cd virtualenv-13.1.0/
chmod +x setup.py
python setup.py install
更新完virtualenv后再次执行续期命令即可!
virtualenv的GitHub页面: