近期因为试了一下 Trojan,就顺便搭建了轻量级的Typecho。
这里记录下过程与心得。
Typecho官网:http://typecho.org/
安装环境:阿里云ECS、Ubuntu19.04、 php7.3、nginx、mysql 5.7、SSL证书(Let’s Encrypt)
环境搭建过程
1、Ubuntu 18.04 升级 19.04
apt update
apt dist-upgrade
apt install update-manager-core
nano /etc/update-manager/release-upgrades
修改 Prompt=lts -> Prompt=normal
do-release-upgrade
2、apt安装php7.3
apt -y install software-properties-common apt-transport-https lsb-release ca-certificates
add-apt-repository ppa:ondrej/php
apt update
apt install php7.3-fpm php7.3-curl php7.3-gd php7.3-opcache php7.3-xml php7.3-mbstring php7.3-mysql
3、nginx直接apt安装
编辑网站配置
增加域名、php、伪静态等
nano /etc/nginx/sites-enabled/default
location / {
                if (-f $request_filename/index.html){
                    rewrite (.*) $1/index.html break;
                }
                if (-f $request_filename/index.php){
                    rewrite (.*) $1/index.php;
                }
                if (!-f $request_filename){
                    rewrite (.*) /index.php;
                }
                if (!-e $request_filename) {
                    rewrite  ^/(.*)$  /index.php/$1  last;
                    break;
                }
                try_files $uri $uri/ =404;
}
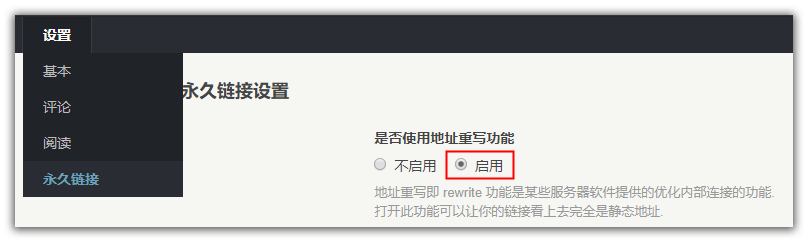
上面前3条规则是伪静态,防404。第4条是启用rewrite功能,将网址里的 index.php 去掉。还需要在Typecho设置里面启用地址重写功能,如下图:
ulocation ~ \.php$ {
        include snippets/fastcgi-php.conf;
        fastcgi_pass unix:/run/php/php7.3-fpm.sock;
}
上面启用php
查看nginx.conf,可知nginx的用户为:www-data。所以这里必须将Typecho文件夹的用户与权限进行更改。
cd到typecho的目录执行以下命令:
chown -R www-data:www-data typecho/
4、mysql直接apt安装
安装后修改密码(解决安装Typecho数据库无法连接的问题):
mysql -uroot -p
use mysql;
update mysql.user set authentication_string=password('输入修改的密码或留空') where user='root' and Host ='localhost';
update user set plugin="mysql_native_password";
flush privileges;
quit;
创建Typecho的数据库:
mysql -u root -p
create database typecho;
quit;
5、申请SSL证书
官网有详细安装指导
Let’s Encrypt官网:https://letsencrypt.org
这里选择我们的环境:https://certbot.eff.org/lets-encrypt/ubuntubionic-nginx
过程:
apt update
apt install software-properties-common
add-apt-repository universe
add-apt-repository ppa:certbot/certbot
apt update
apt install certbot python-certbot-nginx
自动配置:
certbot --nginx
只申请证书:
certbot certonly --nginx